Etching sample preparation for metallography and microscopy

What etching does in sample preparation
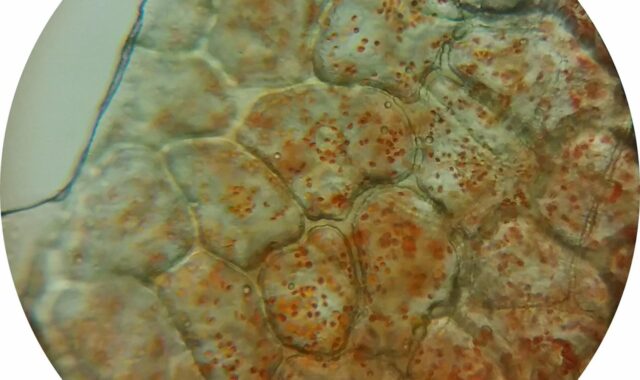
Etching sample preparation is the controlled use of chemical, electrochemical, thermal, or ion-based surface attack after grinding and polishing. Its purpose is to make microstructural features visible for optical microscopy, SEM review, image analysis, grain-size assessment, failure analysis, and quality control. A polished metal specimen may look mirror-bright while still hiding grain boundaries, second phases, segregation bands, weld zones, heat-affected regions, deformation structures, and coating interfaces. Etching develops contrast because those features react differently at the surface.
The objective is not simply to make the specimen darker. The objective is to reveal the structure needed to answer a defined technical question. For that reason, etching belongs within a documented sample preparation workflow, not as a final cosmetic step.
Standards and reference sources such as ASTM E3 for metallographic specimen preparation, ASTM E407 for microetching metals and alloys, ISO 643 for grain-size examination of steels, and ASM metallography references all reinforce the same practical point: etching is reliable only when specimen selection, sectioning, mounting, grinding, polishing, cleaning, and inspection are controlled before the etchant contacts the surface.
Where etching fits in the preparation workflow
Etching is usually performed near the end of metallographic preparation, but the result is determined much earlier. Poor sectioning can introduce heat damage. Aggressive grinding can leave deformation. Incomplete polishing can smear soft phases over hard phases. Residual polishing compound can block the etchant unevenly. If these problems remain, the etch may amplify preparation damage and produce a misleading image.
A typical laboratory sequence is:
- Define the examination question. The preparation route for grain size is not always the same as the route for inclusion rating, coating evaluation, weld assessment, or failure analysis.
- Select and orient the specimen. Orientation matters because rolling direction, weld direction, coating thickness, and fracture origin can affect interpretation.
- Section with minimum thermal and mechanical damage. Coolant, feed rate, wheel selection, and clamping influence the disturbed layer that must later be removed.
- Mount when needed. Mounting supports edges, protects small samples, and improves handling, although high heat or pressure may be unsuitable for some materials or coatings.
- Grind and polish to a true surface. Each step should remove deformation from the previous step, not just improve appearance.
- Clean and dry the surface. Water spots, alcohol residues, polishing slurry, and fingerprints can all cause nonuniform attack.
- Etch, stop the reaction, rinse, dry, and inspect. Inspection should be prompt because some surfaces stain, oxidize, or continue reacting if they are not neutralized or dried properly.
For many metals, the as-polished condition should be inspected before etching. This can reveal inclusions, pores, cracks, pull-out, polishing scratches, coating defects, or relief that may be obscured after contrast is added. In failure analysis, photographing the unetched surface first also preserves evidence that chemical attack may alter.
Choosing an etching approach by material and question
There is no universal etchant. The same alloy may require different procedures depending on whether the laboratory needs to reveal general grain structure, distinguish phases, outline prior-austenite grain boundaries, assess a weld, or prepare a surface for SEM imaging. ASTM E407 is often used as a reference for recommended microetching practices for metals and alloys, while ISO 643 is relevant when the purpose is apparent grain-size determination in steels. These references can guide method selection, but a site-specific SOP and safety review are still required.
| Preparation objective | Common etching direction | Key limitation |
|---|---|---|
| General microstructure in carbon and low-alloy steels | Alcohol-based nitric acid etchants such as nital-type methods are commonly referenced in metallography literature. | Over-etching can darken pearlite, wash out fine details, or exaggerate banding. |
| Prior-austenite grain boundaries in steels | Specialized picric-acid-based or other grain-boundary methods may be used under controlled conditions. | Picric acid requires strict safety controls, especially around drying, storage, and heating. |
| Stainless steels and corrosion-resistant alloys | Electrolytic or mixed-acid procedures are often considered because passive films resist simple chemical attack. | Surface passivation and phase selectivity can make results highly sensitive to voltage, time, and surface finish. |
| Aluminum alloys | Keller-type or other aluminum-specific etchants may be used to reveal grains, constituents, or segregation. | Fine scratches and water staining can be mistaken for structure if polishing and drying are weak. |
| Titanium and titanium alloys | Kroll-type fluoride-containing etchants are widely cited, while some methods use polarized light after careful polishing. | Fluoride chemistry creates high safety demands; mechanical preparation quality is especially important. |
| Copper alloys | Ammonium persulfate, ferric chloride, or alloy-specific etchants may be selected depending on phases. | Color changes and tarnish can occur quickly, so timing and rinse control matter. |
| Coatings, plating, and multilayer cross sections | Very light chemical etching, selective etching, or no etch may be preferred depending on the interface. | A strong etch can undercut coatings or create artificial gaps at interfaces. |
This decision table is a starting point, not a recipe. A defensible method should identify the alloy, heat treatment, sample orientation, surface finish, etchant family, contact time range, stopping method, waste route, and acceptance criteria for a successful reveal.
Process controls that decide etch quality
Surface condition before etching
The surface must be flat enough for the intended microscope method and free from deep scratches, embedded abrasive, smearing, pull-out, and deformation. Etching cannot repair poor polishing; in most cases, it makes preparation defects easier to see. For soft metals, ductile phases can smear across harder phases during polishing and then resist or distort etching. For porous materials, retained liquid can bleed out after rinsing and stain the surface. For coatings, insufficient edge support can lead to rounding, which changes the apparent thickness.
Etchant strength, time, temperature, and movement
Most etching outcomes are controlled by a small set of variables: reagent chemistry, concentration, surface contact time, temperature, agitation, specimen orientation, and how quickly the reaction is stopped. A few seconds can be significant for highly responsive alloys, while some grain-boundary methods take longer. Heating may accelerate certain procedures, but it also increases vapor, reaction rate, and safety risk. Any temperature-assisted method should be justified in the SOP rather than improvised at the bench.
Rinsing, drying, and immediate inspection
Stopping the reaction is part of the method. Rinse sequence, solvent choice, drying direction, and time to microscope all affect the result. Water-sensitive surfaces may stain if water is not displaced and the surface is not dried quickly. Aggressive air flow can move residues across the surface. A practical approach is to inspect immediately after drying, then repeat with a lighter or stronger etch only if the structure is not adequately revealed.
Replicability and records
Etching is often judged visually, which makes records essential. A useful preparation log should include the alloy or material designation, heat treatment if known, plane of polish, polishing endpoint, etchant identity, batch or preparation date where applicable, contact method, time, temperature, rinse sequence, microscope mode, magnification, and the reason the result was accepted or rejected. Without those details, a successful image is difficult to repeat and a failed image is difficult to troubleshoot.
Troubleshooting common etching defects
Many etching problems look like material problems at first glance. Before making a technical conclusion, separate preparation artifacts from real structure.
| Observed problem | Likely preparation cause | Corrective direction |
|---|---|---|
| Surface becomes uniformly dark with little detail | Over-etching, reagent too strong, excessive time, or inadequate rinse. | Repolish lightly, reduce contact time or strength, and inspect in shorter intervals. |
| Grain boundaries are weak or invisible | Under-etching, wrong etchant, overly passive surface, or surface still smeared. | Confirm material and objective, improve final polish, then use a more appropriate method. |
| Random stains or blotches appear | Contamination, water spots, uneven wetting, fingerprints, or delayed drying. | Improve cleaning, handle by the mount or edge, and standardize rinse and dry steps. |
| Scratches become very prominent after etching | Grinding damage or incomplete polishing remained below the mirror finish. | Return to the last abrasive step that removes the damage, then repolish progressively. |
| Edges or coatings are attacked more than the matrix | Etchant is too aggressive for a multiphase or multilayer section. | Use edge-retentive mounting, reduce etch severity, or document the as-polished condition first. |
| Phase contrast changes between operators | Uncontrolled timing, swabbing pressure, reagent age, temperature, or lighting. | Use timed procedures, defined application technique, fresh or verified reagent, and consistent microscopy settings. |
When troubleshooting, change only one variable at a time. If polishing quality, etchant strength, and contact time are all changed together, the lab may obtain a better image without knowing why. That makes future repetition uncertain. See also: buying guides.
Safety and documentation cannot be separated from etching
Etching is a chemical operation, not just a microscopy step. Many etchants use corrosive, oxidizing, toxic, flammable, or reactive chemicals. Hydrofluoric acid and fluoride-containing etchants require especially strict controls because exposure can cause severe systemic injury. Picric acid also requires special attention because dry or improperly stored material can become explosive. Nitric acid mixtures, alcohol-based etchants, ferric chloride, ammonium persulfate, and electrolytes each bring their own hazards.
A laboratory etching program should include written SOPs, approved storage, compatible containers, secondary containment, labeling, ventilation, personal protective equipment, emergency eyewash and shower access, spill response planning, waste segregation, and training before independent work. University EHS guidance and OSHA-aligned chemical hygiene practices commonly require special planning for high-hazard acids and etchants. The practical rule is simple: if the method cannot be performed safely and disposed of legally, it is not a valid preparation method.
Electrical safety also matters for electrolytic etching. Current density, voltage, electrode geometry, electrolyte composition, and contact time influence the surface, but the setup also introduces shock, gas generation, splash, and short-circuit risks. Electrolytic methods should be treated as both chemical and electrical procedures.
How to make etching sample preparation more defensible
For routine quality control, the most useful improvement is not always a new reagent. It is often a clearer decision path. Start with the examination question, choose a reference method, verify that the method fits the material, run a controlled trial on a representative specimen, and document the endpoint. If the image will support a specification decision, failure investigation, or customer report, the lab should be able to explain why that etch was selected and what artifacts were ruled out.
A defensible etching workflow should answer these questions:
- What feature must be revealed, and at what magnification?
- Was the as-polished condition inspected before etching?
- Which standard, handbook, or internal SOP supports the selected approach?
- What preparation artifacts could mimic the feature of interest?
- How are time, temperature, reagent condition, rinse, and drying controlled?
- What safety review covers the chemicals and waste stream?
- What result would trigger repolishing, re-etching, or use of a different method?
This approach turns etching from a trial-and-error finishing step into a controlled part of sample preparation. It also helps different operators reach comparable results, which is essential when images are used for measurements, acceptance decisions, or root-cause analysis.
Frequently asked questions
Is etching always required after polishing?
No. Some examinations should begin, and sometimes end, with the as-polished surface. Inclusions, pores, cracks, coating defects, and polishing artifacts may be clearer before etching. Etching is required when the feature of interest needs contrast that polishing alone cannot provide, such as grain boundaries or phase distribution.
Can the same etchant be used for all metals?
No. Etchant selection depends on the alloy system, heat treatment, phases present, surface condition, and purpose of the examination. A reagent that works well on carbon steel may be ineffective or unsafe for aluminum, titanium, stainless steel, copper alloys, or coated samples.
What is the difference between under-etching and over-etching?
Under-etching produces weak contrast and may leave grain boundaries or phases unclear. Over-etching attacks too strongly or too long, causing darkening, pitting, loss of fine detail, or artificial relief. The right endpoint is the minimum etch that reveals the feature needed for interpretation.
Why does a polished sample show scratches only after etching?
Etching can reveal deformation and scratches that were visually hidden by a reflective finish. This usually means the previous grinding or polishing damage was not fully removed. The corrective step is typically to return to an earlier polishing stage, remove the damaged layer, and repeat the final polish before etching again.
How should a lab choose between chemical and electrolytic etching?
Chemical etching is often simpler for routine work, while electrolytic etching can be useful for passive alloys or structures that need more selective control. The choice should be based on the material, required feature, available equipment, safety controls, and a documented method rather than operator preference alone.