Histology sample preparation guide for reliable tissue sections

Why histology sample preparation matters before the slide reaches the microscope
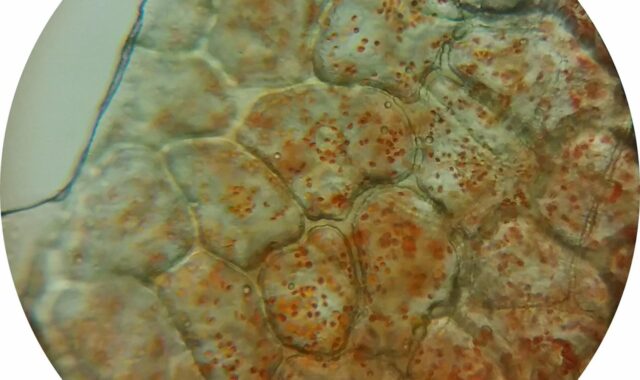
Histology sample preparation is the controlled process that converts a tissue specimen into a thin, stained section suitable for microscopic review. The aim is to preserve tissue structure as close as practical to its original biological state while making the sample firm enough to process, embed, section, stain, and coverslip.
In routine paraffin histology, slide quality depends heavily on prompt fixation, suitable specimen thickness, adequate fixative volume, validated processing conditions, correct orientation, clean sectioning, and staining quality control. When these pre-analytical steps are inconsistent, later instruments and stains cannot fully restore lost morphology or compromised antigenicity.

This article focuses on routine formalin-fixed, paraffin-embedded workflows, with notes on frozen sections, immunohistochemistry, molecular testing, and safety. For related laboratory workflow topics, visit the sample preparation section.
The routine histology workflow in one sequence
Most histology laboratories adapt the same basic workflow to their tissue type, diagnostic or research purpose, regulatory setting, and validated standard operating procedures. It is more than a task list. Each step changes the physical or chemical condition of the tissue, and each step can introduce artifacts if it is rushed, delayed, or poorly matched to the sample.
- Collection and labeling: The specimen is collected, identified, oriented when required, and matched to the request or study record.
- Fixation: The tissue is placed in an appropriate fixative, commonly 10% neutral buffered formalin for routine light microscopy.
- Grossing and trimming: The sample is inspected, measured, described, and trimmed to a thickness that allows fixative and processing reagents to penetrate.
- Dehydration: Water is removed through graded alcohol steps so the tissue can accept clearing agent and paraffin.
- Clearing: Alcohol is replaced with a reagent compatible with molten paraffin.
- Paraffin infiltration and embedding: Paraffin supports the tissue so it can be cut into thin sections.
- Microtomy and mounting: Sections are cut, floated, placed on slides, and dried or baked according to the staining method.
- Staining and coverslipping: Routine hematoxylin and eosin, special stains, or immunohistochemistry make structures or targets visible.
- Quality review: The slide is checked for completeness, orientation, section quality, staining performance, and artifacts.
For routine H&E evaluation, the workflow is designed mainly to preserve morphology. For immunohistochemistry or molecular assays, the same physical slide quality still matters, but fixation chemistry, cold ischemia, and storage conditions can also influence target detection.
Fixation is the first major quality checkpoint
Fixation stabilizes tissue by reducing autolysis, putrefaction, diffusion of soluble components, and mechanical distortion during processing. In many clinical and research histology settings, 10% neutral buffered formalin is the default fixative for routine paraffin work because it provides broad morphological preservation and compatibility with many downstream stains. It is often described as approximately 4% formaldehyde in buffered solution.
Public guidance from the College of American Pathologists notes that complete fixation of a 4 mm tissue section in 10% neutral buffered formalin is achieved in approximately 24 hours, and it gives a general clinical recommendation of 6 to 72 hours for 10% neutral buffered formalin fixation. This range should not be applied automatically to every tissue or assay. It is a reference point that must be interpreted through the laboratory’s validated method, the tissue type, the intended stain, and any applicable professional guideline.
Control tissue thickness and fixative volume
Fixative reaches the center of tissue by diffusion, so thick specimens are a common cause of uneven preservation. Many histology core facilities recommend trimming routine pieces to roughly 3 to 5 mm in thickness before processing. Some tissues need special handling because they are fatty, bloody, dense, calcified, fragile, or orientation dependent. A large specimen left intact in a small container of fixative may appear fixed at the surface while the interior remains poorly preserved.
Fixative volume also matters. Many institutional histology guidelines recommend at least a 10:1 fixative-to-tissue volume ratio, while some workflows use 20:1 for routine fixation. In practical terms, the tissue should be fully immersed, the container should be large enough, and the protocol should be consistent enough for the laboratory to validate the result.
Record time points when results depend on biomarkers
For biomarker testing, both time before fixation and time in fixative can affect results. ASCO/CAP guidance for breast biomarker testing is a well-known example: specimens for ER, PgR, and HER2 testing are commonly handled with a 6 to 72 hour neutral buffered formalin fixation window, and the time from tissue acquisition to fixation should be kept as short as possible. This does not mean every histology sample has the same requirement, but it shows why pre-analytical documentation is more than clerical detail. It can affect interpretation, repeat testing decisions, and confidence in negative or weak staining results.
Processing, embedding, and sectioning turn fixed tissue into readable material
After fixation, tissue must be processed so paraffin can replace water in the specimen. Dehydration, clearing, and infiltration schedules are usually performed on automated tissue processors, but automation does not remove the need for method control. The schedule must fit the specimen size, density, and cassette load. Underprocessed tissue may feel soft, resist clean sectioning, stain unevenly, or detach from the slide. Overprocessing can make tissue brittle, difficult to section, and more prone to microtomy artifacts.
Embedding preserves diagnostic or experimental orientation
Embedding is not only a mechanical step. The surface placed toward the cutting face determines what appears first on the slide. Skin, gastrointestinal biopsies, tubular structures, margins, small cores, and layered tissues often require deliberate orientation. Poor orientation can force deeper recuts, waste tissue, delay reporting, and reduce the chance of seeing the feature that matters most.
Microtomy artifacts often trace back to earlier steps
Chatter, compression, holes, folds, thick-and-thin areas, and fragmented sections may look like cutting problems. The underlying cause, however, may be incomplete fixation, poor dehydration, overheated paraffin, dull blades, an incorrect clearance angle, contaminated water baths, or overextended sections. A useful troubleshooting approach is to ask whether the artifact appears in one block, one batch, one tissue type, one station, or one operator’s sections. Patterns usually point to the root cause faster than isolated slide review.
| Variable | What can go wrong | Practical control point |
|---|---|---|
| Delay to fixation | Autolysis, weak or altered antigen signal, poor nuclear detail | Place tissue in validated fixative as soon as practical and document critical times when required |
| Specimen thickness | Fixed edge with underfixed center | Trim routine tissue to validated thickness before processing |
| Fixative volume | Diluted or exhausted fixative, uneven preservation | Use adequate volume and full immersion |
| Processing schedule | Soft, brittle, or poorly infiltrated blocks | Match schedule to tissue size and type |
| Embedding orientation | Missing epithelium, margin, lumen, or lesion on first sections | Use grossing notes, diagrams, inks, sponges, or molds as appropriate |
| Section handling | Folds, floaters, detachment, uneven staining | Maintain clean baths, appropriate slide selection, and validated drying steps |
Match preparation methods to the downstream test
The right histology sample preparation method depends on the question being asked. A workflow that is excellent for routine paraffin morphology may not be suitable for lipids, enzyme activity, some nucleic acid applications, or urgent intraoperative consultation. Before collection, the laboratory should know whether the tissue is intended for H&E, special stains, immunohistochemistry, in situ hybridization, molecular testing, electron microscopy, frozen section, or biobanking.
Paraffin sections are versatile but not universal
Formalin-fixed, paraffin-embedded tissue is widely used because it produces durable blocks, good morphology, and compatibility with many stains. However, formalin creates chemical crosslinks, and paraffin processing exposes tissue to alcohol, clearing agents, and heat. Those conditions can reduce some molecular signals or require antigen retrieval for immunohistochemistry. When a project depends on RNA quality, phosphoprotein preservation, lipid visualization, or enzyme activity, a fresh, frozen, or specially fixed sample may be more appropriate.
Frozen sections solve different problems
Frozen section preparation is useful when rapid results are needed or when the target of interest is not well preserved by routine paraffin processing. Tissue is frozen in a supporting medium, sectioned in a cryostat, and stained quickly. The trade-off is that frozen morphology is usually less crisp than high-quality paraffin histology, and freezing artifacts can appear if the sample freezes slowly or unevenly. For best results, the collection plan should state whether tissue should be kept fresh, snap frozen, embedded in OCT-type medium, or fixed. See also: buying guides.
Quality control should be built into the workflow, not added at the end
Good histology laboratories do not rely on final slide inspection alone. They control pre-analytical variables before those variables become permanent artifacts. That means using validated SOPs, recording exceptions, training staff on tissue-specific handling, maintaining processors and microtomes, checking reagent quality, and reviewing stain performance with appropriate controls.
For immunohistochemistry, control tissue and known staining patterns are essential because a clean-looking section can still produce a misleading result if fixation or antigen retrieval is inconsistent. Research from the National Cancer Institute’s Biospecimen Preanalytical Variables program and related literature has highlighted that delay to fixation, time in fixative, fixative type, processing conditions, and slide storage can influence immunohistochemical results. The practical conclusion is not that every sample must follow one universal schedule. It is that pre-analytical variables should be deliberate, documented, and validated.
Use documentation as a scientific control
Documentation is especially important when slides will be compared across time, laboratories, study groups, or instrument platforms. Useful records may include collection time, time into fixative, fixative type, container condition, grossing time, cassette thickness, processing program, decalcification method, embedding orientation, section thickness, stain run, antibody clone, retrieval condition, and control result. Not every workflow needs every field, but missing critical information makes troubleshooting much harder.
Safety and compliance are part of sample preparation
Formalin is effective, but it is also hazardous. OSHA’s formaldehyde standard sets exposure requirements for covered workplaces, including an 8-hour permissible exposure limit of 0.75 ppm and a 15-minute short-term exposure limit of 2 ppm. NIOSH also provides more conservative recommended exposure guidance. Laboratories that handle formalin should use appropriate engineering controls, ventilation, labeling, spill procedures, personal protective equipment, exposure monitoring where required, and staff training.
Safety practices also protect sample quality. Leaking containers, poor seals, overfilled jars, unlabeled fixative, and inadequate transport packaging can create both exposure risk and specimen risk. A reliable histology workflow treats containment, labeling, and chain of custody as part of preparation rather than as separate administrative tasks.
Common preparation problems and how to prevent them
Many histology problems can be reduced by controlling a small group of variables before the sample enters the processor. The following checks are useful for routine troubleshooting and workflow review.
- Poor nuclear detail: Review delay to fixation, fixative type, tissue thickness, and total fixation time.
- Soft or mushy blocks: Check fixation completeness, dehydration steps, cassette loading, and processor reagent quality.
- Brittle sections: Review dehydration length, clearing conditions, paraffin temperature, and tissue type.
- Folds and wrinkles: Check section thickness, water bath temperature, flotation time, and slide drying method.
- Tissue detachment: Match slide type and drying conditions to the stain, especially for heat retrieval or harsh special stains.
- Weak immunostaining: Review fixation history, control tissue performance, antigen retrieval, antibody conditions, and slide storage.
- Floaters or contamination: Clean water baths, forceps, embedding areas, and microtome surfaces between specimens.
The most important prevention strategy is communication. Surgeons, animal facility staff, researchers, grossing personnel, histotechnologists, and pathologists may each control only part of the chain. A sample preparation plan works best when all parties know the intended endpoint before tissue is collected.
Frequently asked questions
What is the most important step in histology sample preparation?
Fixation is often the most critical early step because it stabilizes tissue before processing. However, no single step guarantees a good slide. Collection timing, trimming thickness, fixative volume, processing, embedding, sectioning, staining, and documentation all contribute to the final result.
Is 10% neutral buffered formalin always the right fixative?
No. It is common for routine paraffin histology and many immunohistochemistry workflows, but it is not universal. Frozen tissue, specialized fixatives, or fresh handling may be needed for certain molecular assays, lipids, enzyme studies, ultrastructure, or specific research endpoints.
How thick should tissue be before fixation and processing?
Many routine workflows aim for thin pieces around 3 to 5 mm so fixative and processing reagents can penetrate effectively. The validated laboratory SOP should control the exact requirement because tissue density, sample type, and downstream testing can change the ideal thickness.
Why can a well-stained slide still be unreliable?
A slide can look clean but still carry pre-analytical bias. Delayed fixation, overfixation, underfixation, decalcification, heat, or storage conditions may alter antigen detection or molecular integrity even when general morphology appears acceptable.
Can sample preparation be standardized across all histology labs?
Core principles can be standardized, but exact protocols vary. Laboratories should validate their own workflows for specimen type, equipment, reagents, stains, regulatory setting, and reporting requirements. The strongest systems combine standard procedures with clear exception documentation.
Key takeaway
Reliable histology depends on control of the full pre-analytical chain, not just capable instruments or familiar stains. A sound preparation plan defines the intended test, minimizes delay, uses an appropriate fixative and volume, trims tissue to a validated thickness, matches processing to specimen type, preserves orientation, documents critical variables, and reviews artifacts systematically. With those controls in place, histology sample preparation becomes a reproducible foundation for clearer morphology, more dependable staining, and more useful slides.