Soil lab instruments for reliable testing from preparation to reporting

Why soil lab instruments should be selected by method, not by catalog
Soil lab instruments are not interchangeable accessories. They shape how a laboratory prepares samples, controls variability, measures soil properties, and reports results. A reliable soil testing setup starts with the purpose of the test: fertility advice, soil classification, geotechnical design, contamination screening, research, or regulatory support.
Once that purpose is clear, instruments can be matched to recognized methods, sample volume, detection needs, safety controls, and quality requirements. Public references such as USDA-NRCS soil survey laboratory manuals, FAO GLOSOLAN procedures, ASTM soil standards, EPA SW-846 digestion methods, ISO 11464 for sample pretreatment, and ISO/IEC 17025 for laboratory competence all reinforce the same practical point: the workflow should determine the equipment.

For readers comparing broader laboratory equipment topics, the lab instruments section provides related technical articles. This guide focuses on soil laboratories and the instrument decisions that have the greatest effect on data quality.
Map the soil testing workflow before choosing instruments
A soil laboratory is easier to design when the work is divided into stages. Many errors do not begin at the final reading on an analyzer. They begin earlier, when a sample is dried too aggressively, ground unevenly, split poorly, mislabeled, contaminated, or tested with a method that does not fit the reporting purpose.
Sample receipt and preparation
Sample preparation is the foundation of soil testing. ISO 11464 describes common pretreatment steps for physico-chemical analysis, including drying, crushing, sieving, dividing, and milling. In practical terms, a laboratory may need controlled drying space or drying ovens, crushers or mills suited to the soil type, standard sieves, sample splitters, analytical balances, labeled containers, dust control, and cleaning tools.
The main decision is whether the target analytes remain stable under the selected preparation conditions. Air drying may be suitable for many routine fertility measurements. Volatile compounds, biologically sensitive parameters, or contamination work may require different handling. Treating every sample the same way can simplify operations, but it can also produce unsuitable data for certain tests.
Routine chemical measurements
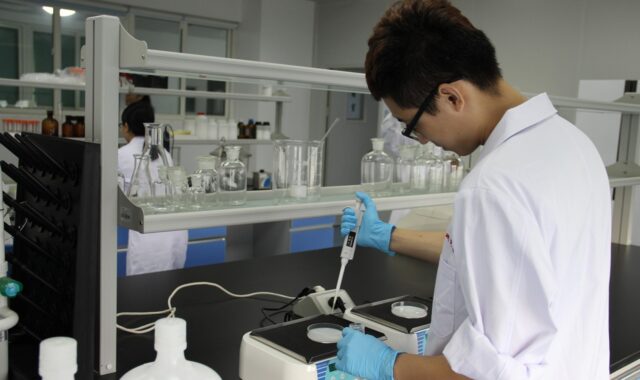
Basic soil chemistry commonly includes pH, electrical conductivity, extractable nutrients, organic matter or organic carbon, and sometimes cation exchange capacity. Typical instruments include pH meters, conductivity meters, reciprocal shakers, centrifuges, filtration equipment, pipettes, dispensers, burettes, spectrophotometers, flame photometers, digestion blocks, muffle furnaces, and combustion analyzers.
FAO GLOSOLAN procedures for pH, electrical conductivity, and soil organic carbon show why harmonized procedures matter. The same sample can produce different results if the soil-to-water ratio, extraction time, endpoint, or calibration routine changes.
Physical and geotechnical testing
Physical soil laboratories often need balances, ovens, hydrometers or laser particle size systems, sieve shakers, Atterberg limit devices, compaction molds, permeameters, consolidation equipment, shear boxes, triaxial cells, and load frames. ASTM standards such as D6913 for sieve analysis, D4318 for liquid limit and plastic limit, and D698 for standard-effort compaction show how equipment requirements are tied to defined procedures, specimen sizes, and reporting formats.
Environmental and trace element work
When soil testing involves metals or contamination screening, sample preparation and digestion become more demanding. EPA SW-846 Method 3050B covers acid digestion of sediments, sludges, and soils for subsequent instrumental analysis. Method 3051A covers microwave-assisted acid digestion for sediments, sludges, soils, and oils.
These workflows may require fume hoods, microwave digestion vessels, digestion blocks, acid-resistant labware, certified reference materials, and analytical instruments such as ICP-OES, ICP-MS, or atomic absorption systems. Safety infrastructure is part of the instrument plan, not an afterthought.
Core instrument groups and what they control
| Workflow area | Common instruments | What the instruments control |
|---|---|---|
| Sample preparation | Drying oven, air-drying racks, crusher, mill, sieve set, riffle splitter, balance | Particle size, moisture state, sample homogeneity, representativeness |
| Basic soil chemistry | pH meter, EC meter, shaker, centrifuge, spectrophotometer, titration setup | Acidity, salinity, extractable ions, colorimetric endpoints, repeatability |
| Nutrient analysis | Dispensers, pipettes, extraction vessels, filtration systems, photometers, ICP systems | Extraction consistency, dilution accuracy, calibration range, throughput |
| Organic matter and carbon | Muffle furnace, digestion block, combustion analyzer, balance | Mass loss, oxidation, combustion measurement, temperature control |
| Particle size and texture | Sieve shaker, hydrometer setup, sedimentation cylinders, laser particle size analyzer | Particle size distribution, classification data, dispersion quality |
| Geotechnical testing | Atterberg limit device, compaction mold, permeability cell, shear or triaxial system | Plasticity, density-moisture relationships, strength, deformation, flow |
| Trace elements | Fume hood, digestion block, microwave digestion system, ICP-OES, ICP-MS, AAS | Digestion completeness for the selected method, detection limits, contamination control |
This table should not be treated as a universal shopping list. A fertility laboratory serving local growers may not need triaxial testing. A geotechnical laboratory may not need an ICP-MS. A research laboratory may need both specialized preparation tools and flexible analytical capacity.
The right mix depends on the sample matrix, reporting obligations, daily throughput, staff competence, and accepted methods.
Selection criteria that affect data quality
Price and brand visibility are easy to compare, but they rarely show whether soil lab instruments will produce defensible results. A more useful comparison begins with method compatibility. If a procedure specifies a temperature range, sieve opening, extraction ratio, specimen mass, or calibration requirement, the instrument must support that requirement with adequate precision and stability.
- Method fit: Confirm that the instrument can perform the specific method used by the laboratory, not just a similar test.
- Measurement range: The instrument should cover expected soil values without forcing excessive dilution, extrapolation, or repeated reruns.
- Resolution and accuracy: A balance used for trace-level preparation has different requirements from a balance used for bulk geotechnical specimens.
- Throughput: Batch size matters. A small drying oven or shaker can become a bottleneck even when analytical instruments are available.
- Sample compatibility: Saline soils, high-clay samples, organic-rich materials, and contaminated soils may require different vessels, cleaning routines, or pretreatment steps.
- Maintenance burden: Electrodes, lamps, pumps, seals, digestion vessels, sieves, and furnace elements all have service lives that affect cost and downtime.
- Data handling: Instruments that export traceable readings reduce transcription errors and support audit trails.
A practical comparison tool is a method-to-instrument matrix. List each test in one column, the required method reference in the second, sample volume in the third, and equipment requirements in the fourth. This helps prevent overbuying and also reveals hidden gaps, such as insufficient drying capacity, inadequate ventilation, or missing calibration weights.
Quality control, calibration, and safety should be planned together
Quality control is not a separate activity added after instruments are installed. It starts with equipment selection. ISO/IEC 17025:2017 is widely used as a framework for competent testing and calibration laboratories because it connects methods, personnel, equipment, traceability, records, and result validity. Even laboratories that are not seeking accreditation can use the same logic to build more reliable workflows. See also: buying guides.
For soil testing, practical quality controls include calibration checks, blanks, duplicates, control samples, certified reference materials where available, documented maintenance, and clear acceptance criteria. A pH meter without regular buffer checks, a sieve set with damaged mesh, or a drying oven with poor temperature uniformity can weaken the entire result chain. Instruments should therefore be selected with calibration access, service support, and documentation in mind.
Safety needs the same early planning. Soil may appear benign, but preparation can generate respirable dust, biological exposure, acid fumes, heavy metal residues, and ergonomic hazards from repetitive weighing or lifting. Environmental and digestion workflows may require fume hoods, acid storage, spill controls, personal protective equipment, pressure-rated digestion vessels, and waste handling procedures. The safer instrument choice is usually the one that fits both the method and the facility controls.
Different laboratories need different instrument priorities
Agricultural soil fertility laboratories usually prioritize preparation consistency, extraction repeatability, pH and EC measurement, nutrient detection, and high sample throughput. Their key investments may include reliable balances, shakers, dispensing systems, pH electrodes, photometric or plasma-based analyzers, and laboratory information systems that reduce manual entry.
Geotechnical laboratories prioritize specimen preparation, moisture-density relationships, classification, strength, and deformation. Their core equipment is more mechanical: ovens, balances, sieves, hydrometers, Atterberg limit apparatus, compaction molds, permeability equipment, consolidation frames, and shear or triaxial systems. Ruggedness, standard conformity, and load measurement accuracy matter more than chemical detection limits.
Environmental laboratories require stronger contamination control and lower detection limits. Their workflow may include drying and grinding tools, acid-cleaned containers, digestion systems, fume hoods, high-purity reagents, blanks, reference materials, and advanced analytical instruments. For these labs, preventing cross-contamination is as important as selecting the analyzer itself.
Teaching and small research laboratories often need flexibility. A modular setup with dependable preparation equipment, meters, basic spectroscopy, and carefully documented methods may be more useful than a complex instrument that only trained specialists can operate. The limitation should be stated clearly in reports: a teaching setup can demonstrate principles, but it may not be appropriate for compliance decisions unless the required method, QA, and competence controls are in place.
Common mistakes when building a soil testing setup
- Buying analyzers before planning preparation: Poor sample preparation can make a high-end analyzer produce unreliable data.
- Ignoring method details: Small differences in extraction ratio, drying temperature, sieve size, or digestion chemistry can change results.
- Underestimating consumables: Electrodes, standards, filters, acids, vessels, reference materials, and replacement sieves affect operating cost.
- Mixing incompatible workflows: Trace metal testing, fertility testing, and dusty grinding may need separated spaces to avoid contamination.
- Forgetting documentation: Without records for calibration, maintenance, and deviations, results become harder to defend.
- Overbuilding too early: A phased setup based on current sample volume and validated methods is usually safer than purchasing rarely used instruments.
Frequently asked questions
What are the most essential soil lab instruments for a small laboratory?
A small routine soil laboratory usually starts with preparation and basic measurement tools: drying equipment, balances, sieves, sample splitters, pH and EC meters, shakers, pipettes or dispensers, filtration supplies, and a suitable photometer or spectrophotometer if nutrient testing is performed. The exact list depends on the methods the lab intends to report.
Are portable soil meters a replacement for laboratory instruments?
Portable meters are useful for screening, field checks, and rapid decisions, but they usually do not replace controlled laboratory workflows. Laboratory methods control sample preparation, extraction conditions, calibration, blanks, duplicates, and documentation more tightly. Field readings should be treated as field data unless they are validated against the required laboratory method.
Which standards should guide soil instrument selection?
Useful references include USDA-NRCS soil survey laboratory manuals for soil characterization, FAO GLOSOLAN SOPs for harmonized soil analysis, ASTM soil standards for geotechnical methods, EPA SW-846 methods for environmental digestion workflows, ISO 11464 for sample pretreatment, and ISO/IEC 17025 for laboratory competence. The relevant standard depends on the test purpose.
How can a lab avoid overbuying instruments?
Build a test menu first. Then map each test to a recognized method, expected sample volume, required detection level, preparation step, QA control, and safety requirement. Instruments that do not support the current method list or a near-term validated method should be delayed until there is a clear use case.
Why is sample preparation equipment so important?
Soil is naturally heterogeneous. Drying, crushing, sieving, milling, and splitting determine whether the analyzed portion represents the submitted sample. If preparation is inconsistent, later measurements may look precise while still being biased or poorly comparable.
Bottom line
The most reliable soil laboratory setup is not the one with the longest equipment list. It is the one where every instrument supports a defined method, a controlled workflow, documented quality checks, and a clear reporting purpose. Whether the lab focuses on agriculture, construction, environmental monitoring, teaching, or research, instrument selection should begin with a practical question: what decision will this result support, and what method makes that result defensible?